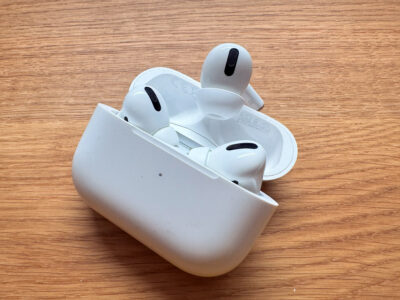
The right one of a pair of 1st generation AirPods Pro broke outside of any warranty. Since Apple only introduced a minimal update this year with the AirPods Pro 2nd gen (2023), the more sensible option was to replace the individual defective pair.
Replacements are available for around 50 euros on Kleinanzeigen.de - you can find similar offers on Ebay.de. AirPods are often sold in "individual parts" (link, right, charger), as you can earn more money than for a complete "set".
After the AirPod arrived, I started pairing it. Apple describes this on its own websiteThe steps must be followed meticulously - otherwise you will have to restart the procedure.
The Re-pairing AirPods is an important process that becomes necessary when using a replacement AirPod or charging case. This may be necessary in situations where an AirPod or the charging case is lost, damaged or needs to be replaced for other reasons. In my case, I simply missed replacing the broken AirPod within the warranty and had to bite the bullet to get a fully usable AirPod Pro again.
Detailed description of the steps
- Inserting the AirPods into the charging case: This is the first step to ensure that both AirPods are ready to be paired with the charging case. At this point at the latest, you would also notice that the new AirPod is not the same generation or a different model.
- Connection to power source and waiting time: The charging case must be connected to the power supply and the lid should be closed. A Waiting time of 20 minutes is necessary to give the AirPods time to prepare for the pairing process.
- Checking the status display: After waiting, the status indicator should flash yellow. This is an indicator that the AirPods are ready to be paired.
- Press the Setup button: The setup button is located on the back of the charging case. It must be pressed and held for 15 seconds until the status indicator lights up white, which means that the AirPods are ready to be paired with a device.
- Pairing with an iOS device: go to the home screen of the iOS device, open the charging case and hold it next to the device. A setup animation will be displayed on the screen, as with new AirPods that are being paired for the first time.
- Completion of the linking process: tap on "Connect" and then on "Done" to complete the process
Troubleshooting
- If the AirPods are not charging properly, make sure that the charging case is correctly connected to a power source. Sometimes USB ports deactivate again or the charging case itself is also defective (and not just the replaced Airpod.
- If the status display does not respond as expected, you need to check whether both AirPods are correctly positioned in the case and whether the setup button has been pressed correctly.
Final tips
To maximize the life of your AirPods, they should be cleaned regularly and ensure that they are always stored in their charging case when not in use.
Summary and conclusion
Re-pairing AirPods is a simple process that becomes necessary when replacement parts need to be used. The procedure is simple if a little annoying (why the AirPods have to "get to know each other" for 20 minutes is probably something only Apple knows), but then works smoothly. Unlike other Apple devices, AirPods are not linked back to the Apple ID or a device - in theory, AirPods that have been found can simply be paired again.
In my case, everything also worked out with the order on Kleinanzeigen.de, so in the end I got working AirPods again for a good 50 euros and a few minutes of time - considering the new price was still a good 200 euros (Price comparison AirPods Pro 1st Gen) a fair price.
