
If you are looking for a small computer for various tasks in your home network, you should consider the Raspberry Pi. For about 50 Euro you can get a complete system, which can be used as a firewall, media player, web server or weather station with appropriate sensors. The possibilities are unlimited, there are many different projects.
The Raspberry Pi is a small single-board computer based on an ARM-SoC: a BCM 2825 whose main processor ARM1176JZF-S is clocked at 700 MHz (and can easily be overclocked to 900 MHz). The system has two USB ports, a LAN port and an SD card slot. The operating system is installed on an SD card, in my case I use Raspbian, which is based on Debian.
Squid and Privoxy: caching and ad blocker
If you use an Apple device at home (for example an iPad) you cannot use an adblocker without jailbreak. However, many forms of advertising do not work properly. Here the Raspberry Pi comes into play, on which I installed Squid (as cache) and Privoxy (i.e. ad filter) as proxy chain. Since Debian 7.0 is the basis, it is quite simple:
# sudo aptitude install squid privoxy
After this is done, you have to build a proxy chain (proxy-chain) from Squid and Privoxy, so that the ad-free pages are kept in the cache. This reduces the load on the Raspberry Pi, because the filters don't have to be applied to every request. Search in /etc/squid/squid.conf for "cache_peer" and enter the specifications for Privoxy there:
cache_peer localhost parent 8118 0 default no-query no-digest
never_direct allow all
If you want to use the Adblock Plus filter lists with Privoxy, you can use the corresponding Script from the Ubuntu community use. On the iPad, the appropriate proxy must then be set for the WLAN connection being used. Squid is specified here: 3128 is the default port under which the caching proxy can be reached.
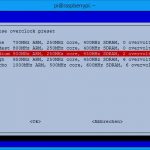
If you want more power, you can simply overclock the Raspberry Pi using the configuration tool: instead of 700 MHz, the system then runs at 900 MHz, which allows a little more air for working as a proxy. In return, a slightly better cooling is useful, which can easily be achieved with flat, passive heat sinks. I have created a short video about this (see below). Of course overclocking is always a risk, so you should be careful with it.
https://www.youtube.com/embed/tOM9D6FZylY
The Raspberry Pi mini-calculator is really an exciting device, with which many more or less meaningful projects can be realized - since the software is simply installed on SD card, you can easily try different things with different SD cards. I will also do other things with the Raspberry Pi - what exactly, I don't know yet 😉
[amazon box="B07TF5PPPN"]

Hello!
Thanks for the good instructions. With a current Raspbian in the Squid configuration I had to additionally allow access to Squid from the local network. By default only requests from localhost are allowed. Therefore I had to replace "http_access allow localhost" in squid.conf with "http_access allow localnet". With "acl localnet src" the local network can be specified, but the private address ranges are already entered by default.
Greetings,
Arne
Well done, only one problem. the truth is that free blacklists are shit.
We have a better solution, blacklisting has evolved, and we are ready to serve the needs of all of your content filtering applications with our superior logic, blacklists from squidblacklist.org are hands down, the best blacklists available for content filtering purposes. We think you will agree.
We want to serve you, all of you
http://www.squidblacklist.org